Setup your Raspberry Pi Model B as Google Colab (Feb '19) to work with Tensorflow, Keras and OpenCV
- 5 minsDescription: Setup OpenCV, Tensorflow and Keras as in Google Colab but in your Raspberry Pi, LOL.
Motivation (The struggle is real!)
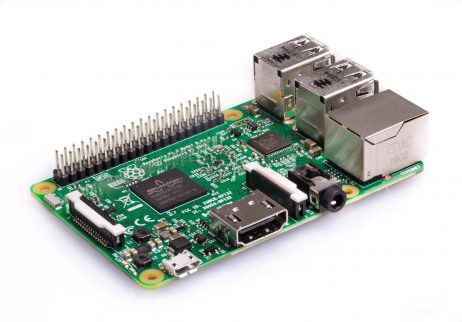
The other day I was happily training some neural networks I built with Keras using the Tensorflow backend on Google Colab. After I finished training like 4 or 5 different deep neural nets, I downloaded the trained models into my Raspberry Pi 3 Model B and realized that it was not able to compile any of these models… But Google Colab is able to compile them…
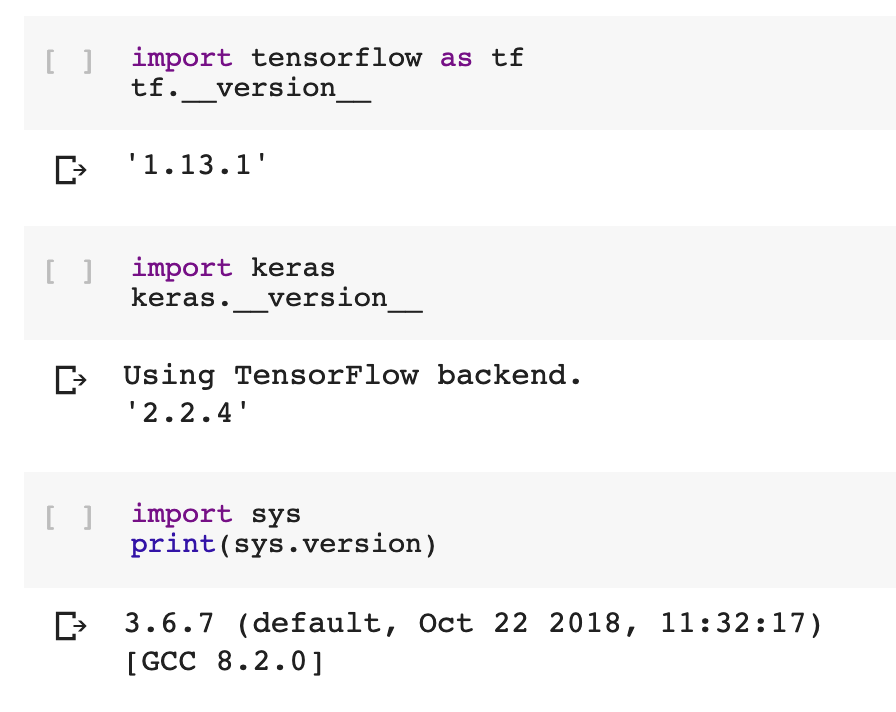
It looked pretty weird to me at the beginning, but soon I noticed that it might be caused by the versions (of Python, Tensorflow and Keras) I was using. My Raspberry Pi was running Python 3.4 with Tensorflow 1.1.0 (compiled from scratch) and Keras 2.1.0, meanwhile Google Colab is running the following:
Anyway, after a couple of days trying some installations, after reading a lot of posts and Stack Overflow answers, I ended up solving everything and writing this blog post, which I hope it becomes very helpful for those having this struggle with these installations on their Raspis.
Let’s get started
Before any installation, please be sure that you’re working on Raspbian Stretch. You can download it from the official site and write the OS image into your memory card using Etcher. (Yes, I totally broke my Raspbian Jesse before noticing that this will work fine and easy with Raspbian Stretch.)
After doing the basic configuration on your Raspberry Pi (connecting it to Wi-Fi, enabling ssh connection, and everything else), we are ready to start the installation of main packages.
First of all, we will need to install pip:
wget https://bootstrap.pypa.io/get-pip.py
sudo python3 get-pip.py
Creating a virtual environment
We will be working on a local environment, so we will need to install virtualenv and virtualenvwrapper. To install them using pip we just need to run in our terminal:
sudo pip install virtualenv virtualenvwrapper
We need to add the following lines to ~/.profile. Let’s open it using nano by doing sudo nano ~/.profile and append these lines to the end:
# virtualenv and virtualenvwrapper
export WORKON_HOME=$HOME/.virtualenvs
export VIRTUALENVWRAPPER_PYTHON=/usr/bin/python3
source /usr/local/bin/virtualenvwrapper.sh
We now close the file and save it (CTRL+X, Y, Y), and we need to “source it” in our terminal:
source ~/.profile
Now that we have the virtual environment setup, we will create a new virtual environment named tfk (which stands for Tensorflow & Keras). To do so, we simply run:
mkvirtualenv tfk -p python3
This should create a virtual environment with our Stretch’s default Python 3 version (3.5.3) and it should be also activated. For any case, to activate/deactivate the virtual environment:
# Activate environment after sourcing ~/.profile
workon tfk

# Deactivate environment
deactivate
Installing OpenCV
We will be installing OpenCV for any image pre-processing that will feed our convolutional neural networks (at least for me it results very useful).
Let’s install some dependencies before OpenCV:
sudo apt-get install libcblas-dev libatlas-base-dev libjasper-dev
sudo apt-get install libhdf5-dev libhdf5-serial-dev
sudo apt-get install libqtgui4 libqt4-test
After installing the dependencies, inside the virtual environment install OpenCV:
pip install opencv-contrib-python
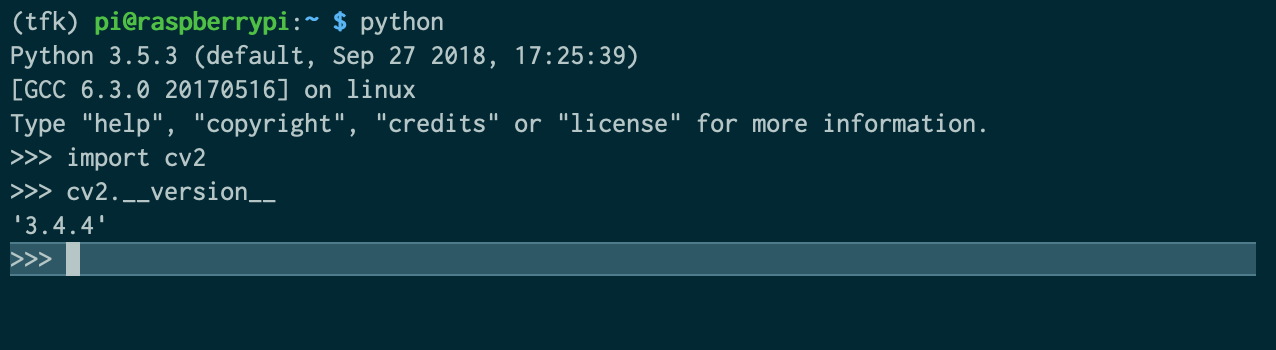
This should install OpenCV in the virtual environment, and we should be able to test it to verify the installation:
Installing Tensorflow and Keras
To install Tensorflow in our Raspberry Pi, we will use pip and install it directly from a whl file that we will get from https://github.com/lhelontra/tensorflow-on-arm. Specifically, we will be installing the 1.13.1 version.
To install Tensorflow directly from this source, we can simply run:
pip install https://github.com/lhelontra/tensorflow-on-arm/releases/download/v1.13.1/tensorflow-1.13.1-cp35-none-linux_armv7l.whl
This should have done the magic, at least with Tensorflow.
Now, to proceed with Keras we will be installing some (more) dependencies and an update:
sudo apt-get install libblas-dev liblapack-dev gfortran
sudo apt-get install python3-dev python3-setuptools
sudo apt-get install python3-numpy python3-scipy python3-h5py

sudo apt-get update
Finally we can install Keras using pip inside our virtual environment:
pip install keras
This should have done the magic, now with Keras.
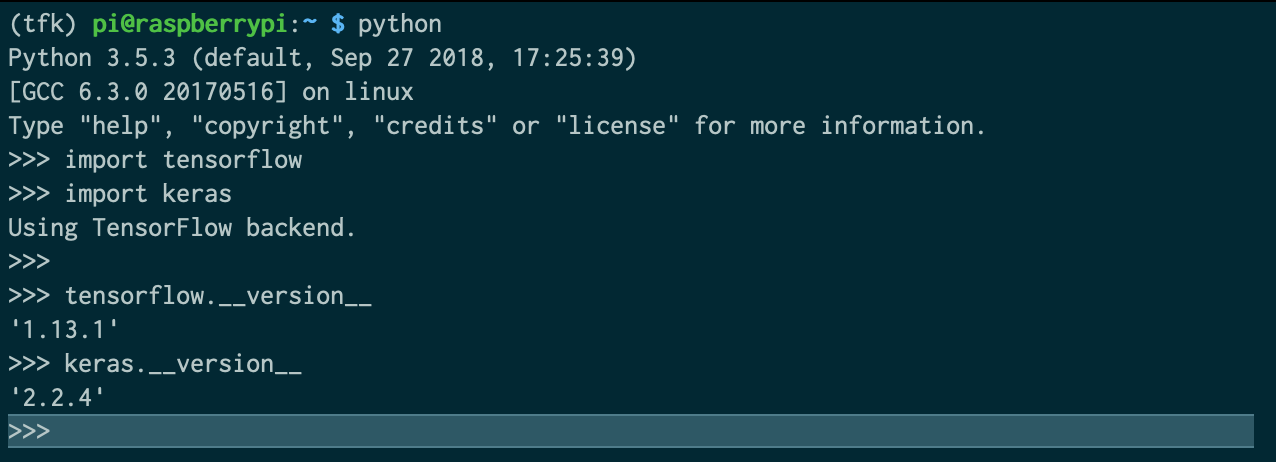
Let’s verify our installations:
Conclusion and installation of other packages
So far, we have installed some basic packages inside our virtual environment for Python 3, as the versions used in Google Colab (possibly a better name for the virtual environment should have been gcolab or something…). This will allow us to compile and run models in our Raspberry Pi, that were trained in the cloud using Google Colab.
To install other packages that are also useful we can keep using pip inside our virtual environment, for instance:
# To install pandas, matplotlib, scikit-learn, flask, and requests
pip install pandas matplotlib scikit-learn flask requests
I hope this post turns out to be helpful.

Rodolfo Ferro
With great power comes great responsibility.